Create the Custom CSS File
To create your own CSS file go to store admin > Online Store > Themes > Actions > Edit code > Assets folder, and click on Add a new asset. On the pop-up select Create a blank file and name it subscribfy-custom-styles.css
Once you have the new CSS file created, you can add your custom CSS. The important part is to "call" from your theme, so it's actually used.
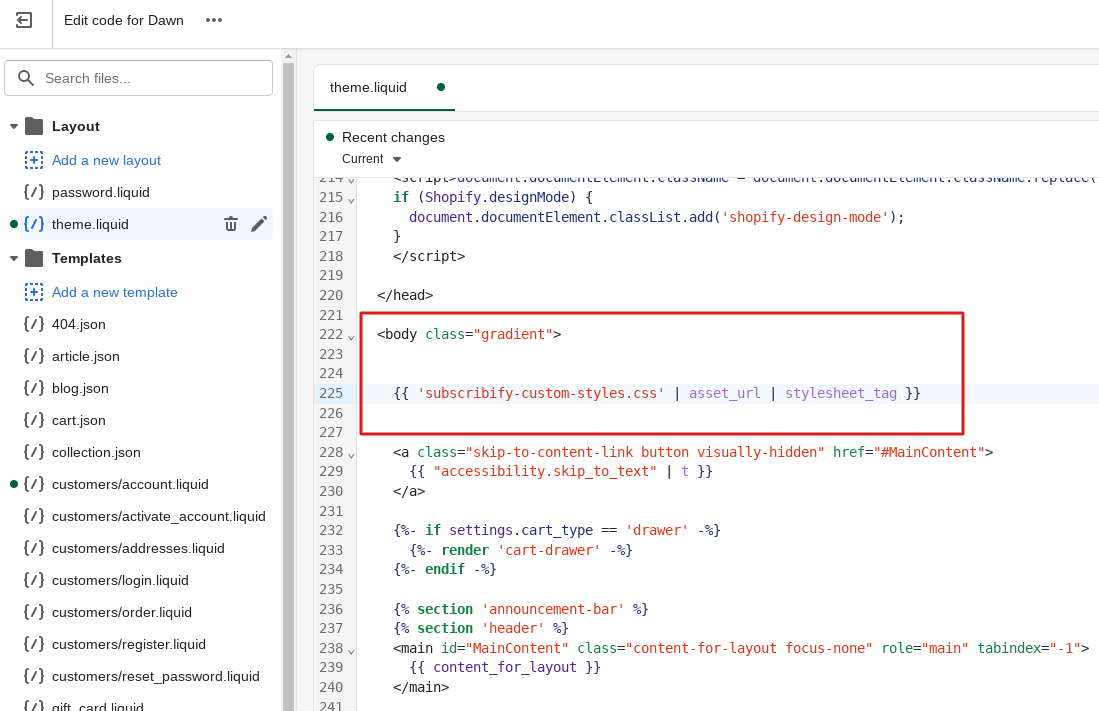
To do so go to Layout folder and open a file called theme.liquid. Add following liquid code after <body> section where "subscribfy-custom-styles.css" is the file name of your custom CSS file.
{{ 'subscribfy-custom-styles.css' | asset_url | stylesheet_tag }}
App Embed
The easiest way to add a link membership dashboard is via an App Embed. This is a special widget that you enable within your Shopify theme that will attempt to add a membership dashboard link to your customer account page.
You can access the App Embed directly by clicking the button on the Installation tab of your membership details page.
Advanced
If you feel comfortable editing HTML and would prefer to add the membership management link manually, you can edit your Shopify theme directly. To begin, head to your Shopify's Online Store section, and click Actions > Edit Code next to your theme.
Select the customers/account.liquid file from the left hand menu.
Find the spot on this page where you want to include your Manage Membership link. Paste the code there. The code can be found on Subscribfy app admin Installation page on STEP 3.
Once you've configured your membership perks and pricing, you'll want to add the selling plans (pricing options) to your membership product within Shopify.
The easiest way to add selling plans to your membership product page is via an App Embed. This is a special widget that you enable within your Shopify theme that will attempt to automatically add selling plans to your membership product.
You can access the App Embed directly by clicking the button on the Installation tab.
1) Subscription Model: With Subscribfy app, you can set the price and frequency (weekly, monthly, annually) of the membership, and we'll charge the customers accordingly. You can even offer perks to your subscribers, like exclusive discounts and free shipping. Contact us so we can discuss how to customize these options for your store.
2) Offer your customers a free first month of membership, and they will be charged at the end of the month/week based on the frequency you choose. For example, if your membership costs $10 per month, and you sign up on February 17th, your first charge will be on March 1st, and then on April 1st, May 1st, and so on (you can choose the specific charge dates).
3)
A. If you’re selling a product you can decide to have this charge transform into store credit and spend it on your website. In my example, if you decide to have the membership price transform into store credit at May 2nd (third recharge) if all charge were successful I would have 30$ store credit.
B. If you choose not to offer store credit, the customer will simply pay the membership fee to access your service.
Follow the steps below to launch your membership program.
1. Create your membership
Start by clicking the "Add subscription plan" button to go to the membership creation form. Fill out the General Info with information about your membership. All the details here will be used to create the membership product in Shopify and will be visible to your customers.
2. Specify your perks
Once you create your membership, go to the Perks tab of your membership.
Add the perks below to your plan by checking the boxes next to the relevant perks. Be sure to save your changes after editing.
Free Shipping
Discounted Products or Collection
Welcome Offer
Store credits
3. Theme Customization
Customize the way shopping cart widget looks.
4. Installation
Now that you've configured your membership, you'll need to display shopping cart widget and show discounted prices on your store.
Yes. You will need to enable customer accounts within Shopify.
To do that, go to your shopify admin Settings > Checkout section and make sure that customer accounts are required.
Subscribfy Memberships enables you to to create 2 types of membership programs:
VIP membership:
Free Shipping
Discounted Products or Collection
Welcome Offer
Store credits
Elite membership
all VIP membership perks
Bundle/Collection of the month
Shopify's Real-time shipping plugin (or also known as Carrier Calculated Shipping or CCS) is required to use Free Shipping perk with the Shopify checkout.
If this is not already included on your plan, you have the following options:
FREE, if you are on annual billing (you also save 10% off your plan!)
$20/month, for all other plans
Upgrade to a plan which includes it
For the first two options, you will need to contact Shopify to have this enabled on your plan, be aware if you make changes to your plan, you will need to ask them to re-add it to your plan.
CCS is included on the Advanced plan or higher.
Limitations
Shopify caches all rates returned by all shipping apps. In some cases where a customer has used the back button and updated the items in their cart or made other changes, Shopify may not retrieve fresh rates from our app and opt to return a set of old rates.
This means your customers may not see the most up-to-date rates. Unfortunately this is a quirk of Shopify's checkout system and there is no workaround for this issue.
Subscribfy app only works on your cart page so please let your customer redirect to the cart page after adding products to cart, before reaching the checkout page.
Customers can't use accelerated checkouts or local payment methods for purchase options.
To use subscriptions, merchants need to use the following payment gateways:
If you're seeing the error "Variant can only be purchased with a selling plan" on your membership product page when you try to purchase a membership, it usually means that the selling plans haven't been added properly to your theme, so Shopify isn't able to find the subscription payment option associated with the membership tier you're trying to purchase.
Follow the instructions here.